Generator
This node generates splines which will be later converted into hair by the Visualizer node.
Tip
Don’t go overboard with Density and Control Points Count parameters. Start with lower spline density and control points first and go higher gradually as your groom progresses further.
Inputs
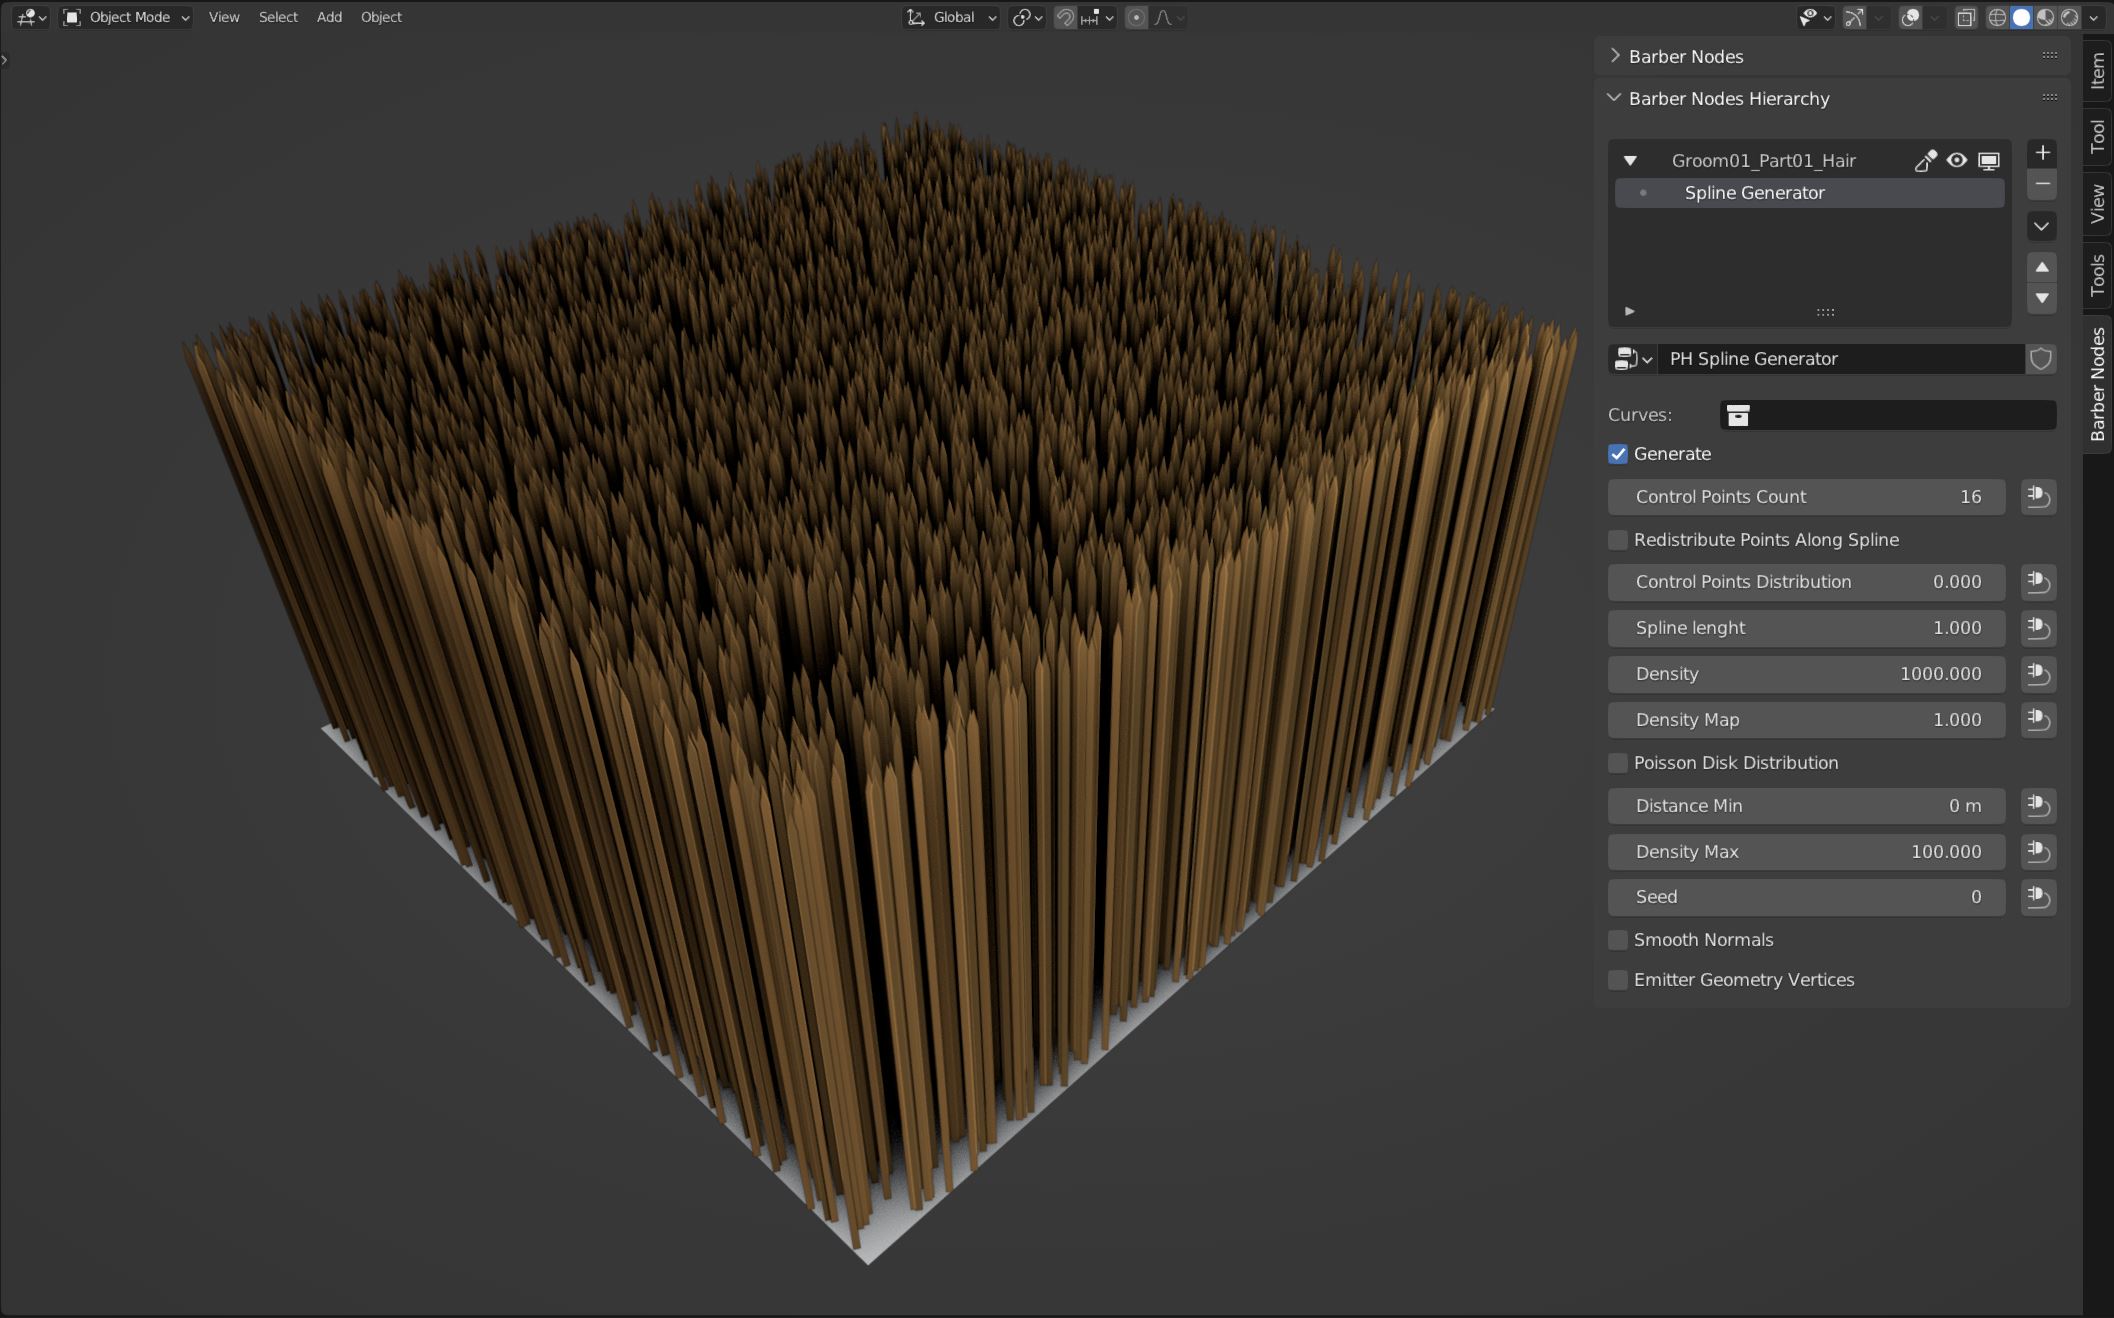
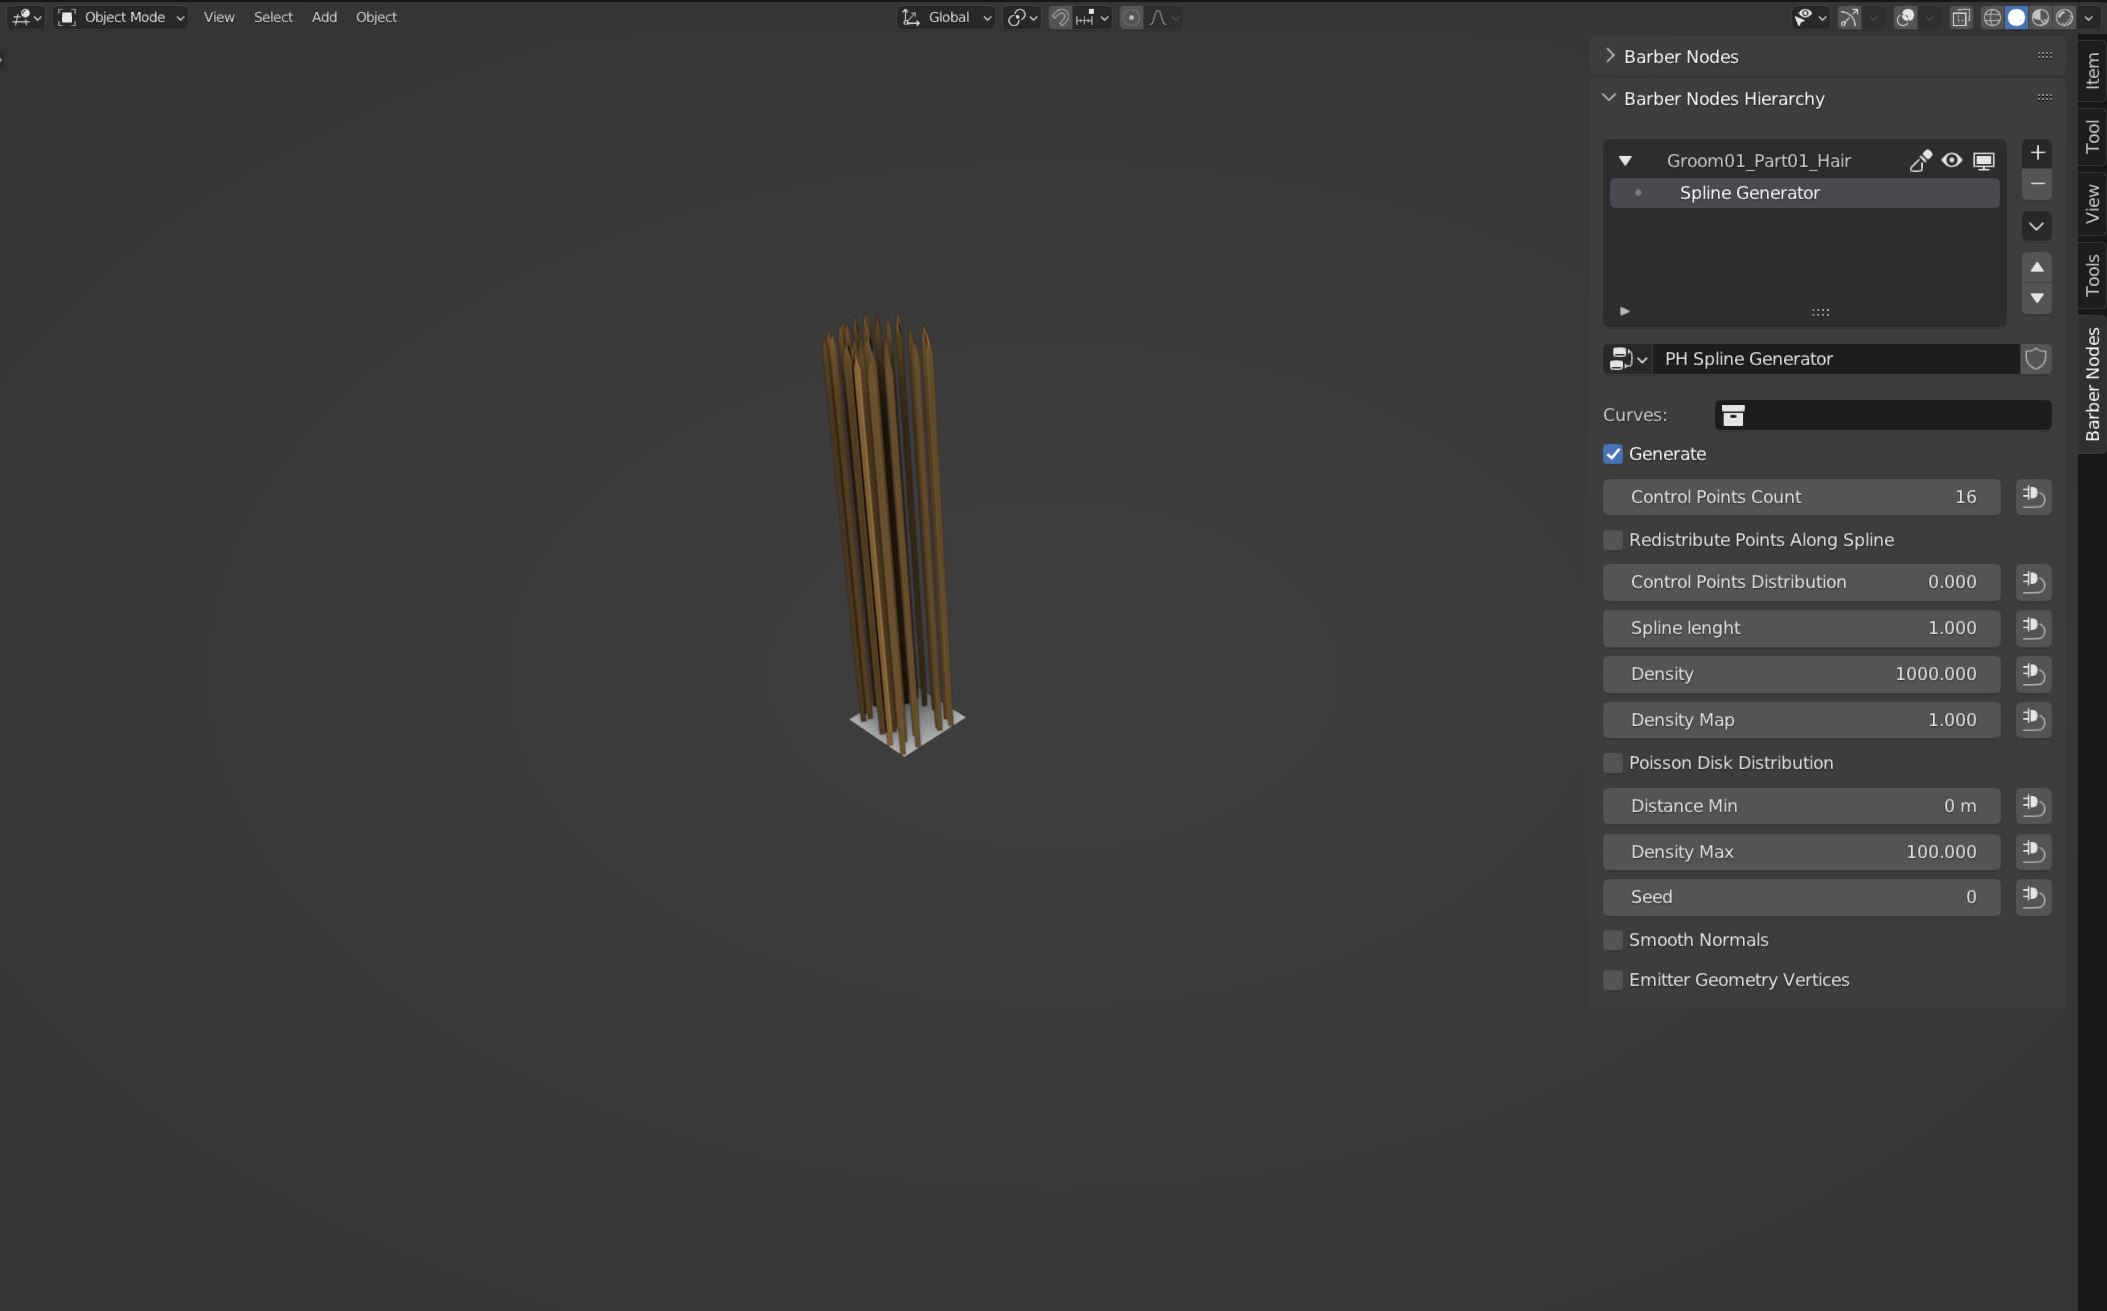
- Density
Defines how densely the splines will be distributed. It is important to note, that the value of this parameter doesn’t represent amount of splines. It will produce different results dependent on how large the Emitter Object is.
Example:
The Density of 1000 will produce this result when used with the default 2 x 2 meter plane:
Same value on the 10 x 10 centimeters plane results in this:
- Density Map
Accepts black and white values. Black values will simply leave the surface without any splines (it is a sipmle multiplier for ‘Density’). The parameter can be influenced by the Mask Groups for example: Texture or Noise.
Note
Emitter Object’s mesh resolution affects the quality of the influence. Low resolution mesh will make the Texture Mask Group inaccurate. As side effect splines will be partially instanced in black value areas.
- Spline Length
defines the length of the generated splines by default the length is set to 1 meter. This parameter can be changed manually or by using different Mask Groups.
- Control Points Count
is one of the most important parameters, together with Density it directly affects the performance of the addon. The parameter defines how many control points per spline there will be. All of the splines will have the same amount of above mentioned control points.
- Guide Curves
Control Points Count of the Generator on Guide Curves object is driven with the driver from the Generator of the Hair object. This driver is automatically created when ever the Create Guide Curves operator is activated.
Properties
This node has no properties.
Outputs
- Splines
The actual generated splines by the generator
- Emitter Geometry
The mesh geometry on top of which, the splines are distributed